Settlements
Settlements are Player made Villages. To start one, craft a Settlement Flag and place it down. Settlers can be recruited to join your settlement at other villages, or when you run into them in the world.
For more settlers to join, you need to build beds in houses.
A house or room needs to be closed off via Walls and have a door. If there is no bed, no valid flooring, and no light source, their happiness will take a penalty.
Settlers will have jobs in a settlement, which they perform as long as the job is within settlement bounds. The Settlement Flag location does not matter.
The Settlement Interface is displayed when you use the Open settlement keyboard Control (C by default). It is used to control your Settlement and to automate the actions of your settlers within it.
For players who wants help with starting their settlement and setting up basic automation, check Guide:Settlement_basics.
Settlement Metrics[edit]
Settlements standard size is 80 x 80 tiles (or 240 x 240 for Settlements created before v1.0). It can be expanded in the settlement settings tab using money and resources.
The boundaries of a settlement are NOT centered around the Settlement Flag. Rather, internally the world map is divided in fixed regions of 16 x 16 tiles, and the settlement boundaries are fitted around the region holding the flag. For instance, if a settlement has a size of 80 x 80, that's 5 x 5 regions, so the settlement extends by 2 regions on each side from the center region holding the flag.
| Settlement size | Upgrade requirements |
|---|---|
| 80 x 80 | Starting size |
| 112 x 112 | |
| 144 x 144 | |
| 176 x 176 | |
| 208 x 208 | |
| 240 x 240 | |
| 272 x 272 |
Note: before the 1.0 update, a chunk size was 300 x 300, meaning if you upgraded from pre-1.0 to 1.0+, this means your settlement size lost 60 squares in x and y range, not to mention if your settlement flag wasn't in the center of its chunk, the area it covered beforehand may be significantly different than the area covered after the update. This does mean that raids that once happened outside of a settlement wall may very well now happen inside of them.
Multiple Settlements[edit]
Additional Settlement Flags can be crafted and placed on islands without an existing player or NPC Settlement.
As with your first settlement, an Elder will arrive shortly.
NPC arrivals and raids will mention to which settlement they belong.
Note: If you have two settlements near eachother, it's possible the raid for one settlement will spawn inside the other settlement, and those raiders will attack that settlement as well.
Quests are seperate for each Settlement, but Boss Quests will autocomplete if you already killed them.
Please note that Quests currently do not show to which settlement they belong.
Once you have 2 settlements you can choose to which one you recruit new settlers, you can also send settlers from one settlement to another. To do so, press the Open settlement button (C by default), then Settlers, and on the settler you want, click Move settler to another settlement, then select the settlement you want.
Settlement Chests[edit]
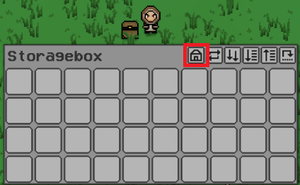
To allow settlers to use Storageboxes and Chests, Right-Click the chest to open its inventory, then press the Settlement Button at the top. In the next screen, you can choose what items are allowed inside this chest.
Jobs[edit]
Farming[edit]
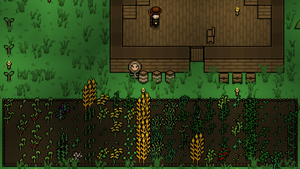
A Settler with the farming skill will farm Farmland around his house.
Make a Farmland field close to the settler's house, and plant the seeds yourself.
Once the seeds can be harvested, the settler will replant them.
Be sure the settler has access to a chest with Seeds and Plants Allowed.
Fertilize[edit]
The Farmer will fertilize Farmland that is within an assigned Fertilize Zone around his house.
Press the Open settlement button (C by default), then Assign work, and choose Assign fertilize zone, then select the land you want to use.
The Farmer will fertilize Farmland with planted seeds.
Fertilized Farmland speeds up growth of the crop.
Be sure the Farmer has access to a storage with Fertilizer.
Animal Husbandry[edit]
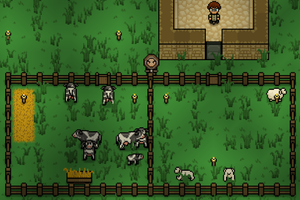
The Animal Keeper will take care of Animals around his house.
You will want your animals to be fenced in. Make some Fences, (ex. Wood Fence) and a Gate (ex. Wood Fence Gate), and place them near the Animal Keepers house. Press the Open settlement button (C by default), then Assign work, and choose Assign husbandry zone, then select your entire fenced area.
For how to find, tame, and benefit from animals, visit the Domesticated Animals page.
Forestry[edit]
A Forestry zone can be assigned for all Settlers to work in.
Press the Open settlement button (C by default), then Assign work, and choose Assign forestry zone, then select the land you want to use.
Next, plant some Saplings in the selected area, and be sure to place a chest nearby with Saplings and Logs allowed.
Settlers will automatically replant Saplings from the cut trees.
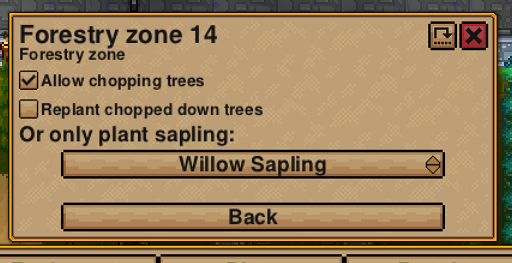
You can also configure the zone to allow settlers to plant new saplings in new areas, effectively automating expansion of the farm in the selected work area.
To do this, simply go to Assign Work tab, then left click on the forestry zone to configure it, and lastly turn off Replant chopped down trees and pick a sapling type in Only plant sapling.
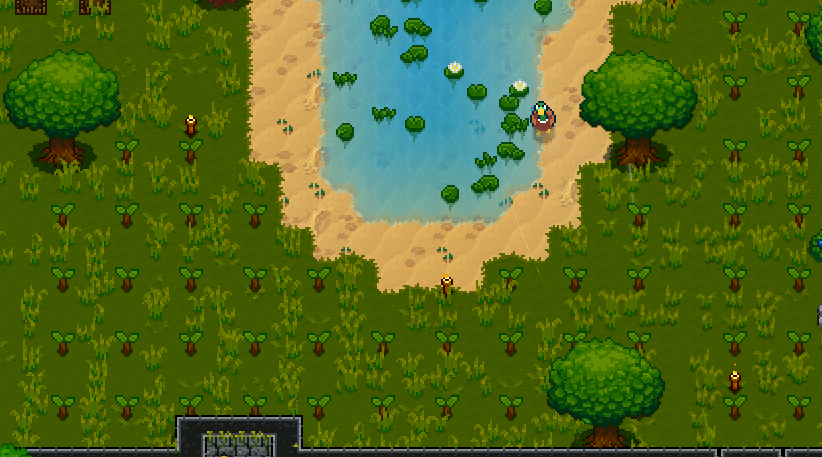
If configured correctly, settlers will move and plant saplings in this design.
Other Tasks[edit]
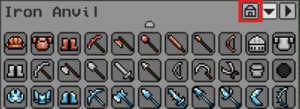

When you set Recipes in Crafting Stations, Settlers will use available Items from Chests to craft these recipes.
To set up a recipe, Right-Click a Workstation, and press the Settlement Button at the top.
In the next screen, press Add Recipe, and choose an item. To change the amount of items the settlers will craft, use the '+' and '-' in the itemline.
For other settings, like 'Do until X' or 'Do Forever', press the arrows button in front of the '-', and choose the option.
Holding shift and left clicking the '+' or '-' will move the number up or down by 10.
Example:
A Settler can farm Wheat automatically, and put it in a Chest.
Place a Grain Mill nearby, and add the 'Flour' Recipe, so Settlers will get the Wheat, and make Flour.
Place a Cooking Station nearby, and add the 'Bread' Recipe. Settlers will get the Flour, and make Bread.
Settlement Quests[edit]
Settlement quests are Quests given by the Elder settler to kill Bosses, given in the order of the intended Boss progression. The quests give unique items as a reward, only obtainable from settlement quests. After the first time obtaining these unique items, they will start to be sold by the Elder (except for the Homestone and Waystone, which are sold by the Mage).
Quests from the same settlement are shared between all players that accept it. If one player completes it, other players will not be able to. The quest progression is unique to the settlement, meaning if you start a new settlement, you will have to start from the first quest tiers.
Equipment[edit]
Settlers can be equipped with Armor and Weapons. By default, they will grab the best equipment from chests that they can access. You can customize what they can equip, and if they automatically equip gear by pressing the Open settlement button (C by default), then Equipment, and configuring it there.
To directly equip gear, place the gear into your inventory, talk to the settler, and select the 'Let's look at your equipment' dialogue option.
Note: Settlers cannot use summoner weapons and thus don't benefit from summoner armor.
Happiness[edit]
There are 5 different ways to increase settler happiness. Having more than 100% happiness on a settler has no effect.
| Happiness Levels | Happiness |
|---|---|
| Unhappy | 30%+ |
| Somewhat Happy | 50%+ |
| Even more Happy | 60%+ |
| Very Happy | 70%+ |
| Extremely Happy | 90%+ |
Effects of Happiness[edit]
Happy settlers give better shop prices and take shorter work breaks. If their happiness goes below 50%, they'll eventually go on strike until you improve things.
Shop prices are determined based on the item's minimum and maximum price, and a range. Happiness then interpolates between the minimum and maximum with range applied randomly afterwards. If the settler is happy, buying an item from a them reduces the price, while selling increases its sell value. Example for player buying an item: If the minimum is 100, maximum is 200, and range is 10, it means a settler with 50% happiness will have a random price between 145 and 155. With 100% happiness it will be between 100 and 110. And for 0% between 190 and 200.
Happiness also gives other benefits such as increased chances of good enchantments when enchanting with the mage.
Food Quality[edit]
Having settlers eat better quality food is perhaps the easiest way to increase their happiness.
Settlers will only eat from chests assigned as settlement storage.
| Food quality | Happiness |
|---|---|
| Simple | +10% |
| Fine | +20% |
| Gourmet | +35% |
Use the Diets button in the Settlement Interface to control which food your settlers can eat. For the best happiness gains, you should limit their choices to Gourmet Food items, when possible.
Room Size[edit]
Providing your villagers with larger rooms will increase their happiness.
The internal tile count refers only to the usable space inside the walls, not including the wall tiles themselves. For example, to create a room with 49 internal tiles, you must build a room with outer dimensions of 9×9, since the surrounding walls add one tile of thickness on each side.
Note: Max room size is 500 tiles. A confined space larger than 500 tiles will not be considered a valid room and will be registered as outdoors.
| Name | Internal tiles | Happiness |
|---|---|---|
| Baby | 0-9 | +0% |
| Tiny | 10-19 | +4% |
| Small | 20-24 | +8% |
| Mediocre | 25-29 | +10% |
| Decent | 30-39 | +12% |
| Large | 40-49 | +15% |
| Huge | 50-59 | +18% |
| Enormous | 60+ | +20% |
Furniture[edit]
Providing your villagers with more varied furniture will increase their happiness. A room's furniture score is based on the different types, with each unique type increasing the score by one. Examples of furniture types are: chairs, tables, beds, clocks, dressers, flower pot, candelabras, etc. The same type of furniture only takes effect once (e.g. a desk and a modular table will only count as 1 point towards the furniture score). With only a bed, the furniture score starts at 1 - dull. Six more furniture types are needed to reach the unrivaled furniture score.
| Name | Score | Happiness |
|---|---|---|
| Plain | 0 | +0% |
| Dull | 1 | +4% |
| Simple | 2 | +7% |
| Normal | 3 | +10% |
| Good | 4 | +13% |
| Impressive | 5 | +15% |
| Wonderful | 6 | +17% |
| Unrivaled | 7 | +20% |
An example furniture combination with a cheap material cost while still reaching the unrivaled score would be: 1 bed, 1 chair, 1 candelabra (handles settler unhappiness being in the dark while also being a furniture type), 1 desk (or modular table), 1 toilet, 1 dresser, and 1 flower pot (with an installed flower).
Diet Variety[edit]
Providing your villager with a wider variety of foods for them to eat will increase their happiness.
| Name | Different Foods | Happiness |
|---|---|---|
| No Variety | 0-1 | +0% |
| Slightly Varied | 2-4 | +10% |
| Somewhat Varied | 5-7 | +20% |
| Nicely Varied | 8-11 | +30% |
| Extremely Varied | 12+ | +40% |
Use the Diets button in the Settlement Interface to control which food your settlers can eat, ensuring that they have a choice of at least 12 food items, if possible.
Settlement Size[edit]
A larger settlement can negatively affect villager happiness. Settlement size increases as you invite settlers to your settlement.
Initially, settlers receive a large bonus to happiness. However, as the settlement grows this bonus decreases by 10% per tier.
| Size | Settlers | Happiness |
|---|---|---|
| Tiny | 0-5 | +40% |
| Small | 6-11 | +30% |
| Medium | 12-17 | +20% |
| Large | 18-23 | +10% |
| Huge | 24+ | None |
Barracks[edit]
If settlers have to share a sleeping area, they will have decreased mood. This caps out at -50 mood.
| Number of Settlers | Happiness |
|---|---|
| 2 | -20% |
| 3 | -30% |
| 4 | -40% |
| 5+ | -50% |
Other Happiness Debuffs[edit]
| Reason | Happiness |
|---|---|
| Unfinished Floor | -10% |
| Missing Lights | -10% |
Settlement builds[edit]
The main goal is to get our villagers to at least 90% happiness, regardless of settlement size. Due to bigger settlements dropping villagers' happiness we will be focusing on gaining happiness for them in other ways to compensate. I'll show what effects villager happiness in parenthesis. For optimality make sure you have the following in your settlements:
Room Size: No less than a 10x10 of walls per room, And no bigger than a 12x12 of walls per room. (+20% Happiness)
For non-box houses you'll just need to make sure there's at minimum 60 tiles inside, Easiest way to do this is to make a separate stack of 60 floor and make sure it all gets used, if not make your building bigger as needed.
Furniture: You'll need 7 types of different furniture. (+20% Happiness)
Do note that beds are required and count towards unique furniture! Some furniture count as duplicates. If you don't care about optimality feel free to use a double bed per building to maximize settler count. To max out settler happiness choose 7 of these furniture to place.
Bed, Chair, Table, Bench, Bookshelf, Cabinet, Candelabra, Dresser, Clock, Toilet and Bathtub.
Duplicates: Modular Tables, Desks and Dinner Table count as duplicates of each other, choose at least one. Beds and double beds count as duplicates of each other.
Food: You'll need a Variety of Gourmet food. (Gourmet +35% Happiness, Variety +20% Happiness)
We'll need 5 different gourmet foods for the variety and food quality to hit the 90% happiness threshold and how to automate crafting for them. We'll be going for the foods that need the least amount of materials to make.
In order from least to most materials: Sweet Lemonade(2), Blueberry Cake(3), Root Salad(3), Tropical Stew(4), and Fresh Potato Salad(4)
Raw Materials List: Sugar Beets (For Sugar), Lemons, Blueberries, Wheat (For Flour), Carrots, Beets, Potato, Coconut, Eggplant, Chili Pepper, Corn, Cabbage and Apple.
Sweet Lemonade: Plant Sugar Beets to process into Sugar at a Grain Mill, and Lemon Saplings.
Blueberry Cake: Plant Blueberry Bushes to get Blueberries, Wheat to process into Flour at a Grain Mill, Sugar Beets to process into Sugar at a Grain Mill.
Root Salad: Plant Carrots, Beets and Potatoes.
Tropical Stew: Plant Coconut Saplings, Eggplant, Chili Pepper, and Corn.
Fresh Potato Salad: Potato, Cabbage, Corn, and Apple.
You'll want 2 grain mills for crafting, set one to have 2 sugar from sugar beets and the other for wheat into flour, and a cooking station with the 5 gourmet foods recipes selected, expand as needed based on settlement size.
Final notes: General good to know things.
A general good rule for any settlement, optimal or not, is to have one to two farmer(s) per 12 non-farmer settlers.
Be sure to have settlers armored up or a guard squad.
Having an alchemist or two constantly making revival potions wouldn't hurt to have.
Decoration is a great way to make your settlement look great so feel free to overdo it on the houses.
If you find you're making more food than is being consumed feel free to sell some of the extras for some coin, just be sure to keep the variety up.
You can get away with having a Huge sized room per villager as long as all other requirements are met to maintain 90%+ happiness, as it only takes away 2% happiness of the 95% they would have with an Enormous sized room.
